
An Instagram grid maker lets you take one photo, split it into equal tiles and post them so they join up into one big picture on your profile. It is the trick behind those seamless “puzzle” feeds you see on brand pages, artist portfolios and travel accounts. In this guide you will learn what a grid maker does, the correct Instagram grid size for 2026, how to split and post your tiles step by step, and how new AI features make the whole job faster.
Quick answer
- An Instagram grid maker cuts one image into 3, 6 or 9 tiles (3×1, 3×2 or 3×3).
- The profile grid now shows posts as 3:4 vertical tiles, so export each tile at 1080 × 1440 px for a perfect fit.
- Always post tiles in reverse order: bottom-right first, top-left last.
- AI tools can now extend, upscale and plan your grid automatically.
Try it free: Use our Instagram Grid Maker to split any photo into 3×1, 3×2 or 3×3 tiles right in your browser. No signup needed.
What Is an Instagram Grid Maker?
An Instagram grid maker is an app or online tool that divides a single image into a set of smaller images. Each small image becomes its own Instagram post. When all the posts sit next to each other on your profile, they recreate the original photo as one large, continuous picture.
Instagram profiles always show three posts per row. A grid maker uses that fixed layout and cuts your image into columns of three, so every tile lands in the right spot. Most tools also number the tiles and tell you the order to upload them.
There are two main types:
- Grid splitters—they cut one image into tiles (for example, 3×3). This is what most people mean by “Instagram grid maker.”
- Grid planners—they show a preview of your future feed so you can drag posts around, check colors, and schedule uploads before anything goes live.
Many modern apps combine both, and the newest ones add AI to suggest layouts, fix image sizes, and keep your feed visually consistent.
Why Use an Instagram Grid Maker?
Your profile grid is the first thing people see when they tap your name. A planned grid can turn a casual visitor into a follower in a few seconds. Here is why creators and brands use grid makers:
- Strong first impression: a giant split image looks bold and professional on a profile page.
- Product launches and announcements: a 3×1 or 3×3 banner makes a launch, sale, or event impossible to miss.
- Brand consistency: planning the grid keeps colours, fonts, and themes in line with your brand.
- Storytelling: each tile can work as a single post while the full grid tells a bigger story.
- Saves time: no manual cropping in Photoshop. The tool handles exact pixel sizes for you.
Instagram Grid Size in 2026: The New 3:4 Layout
For years, the Instagram profile grid used square 1:1 thumbnails. In early 2025, Instagram switched the profile grid to vertical 3:4 rectangles, and that is still how profiles look today. This change matters a lot for grid makers: old square tiles no longer line up perfectly, and parts of each tile get cut off on the profile view.
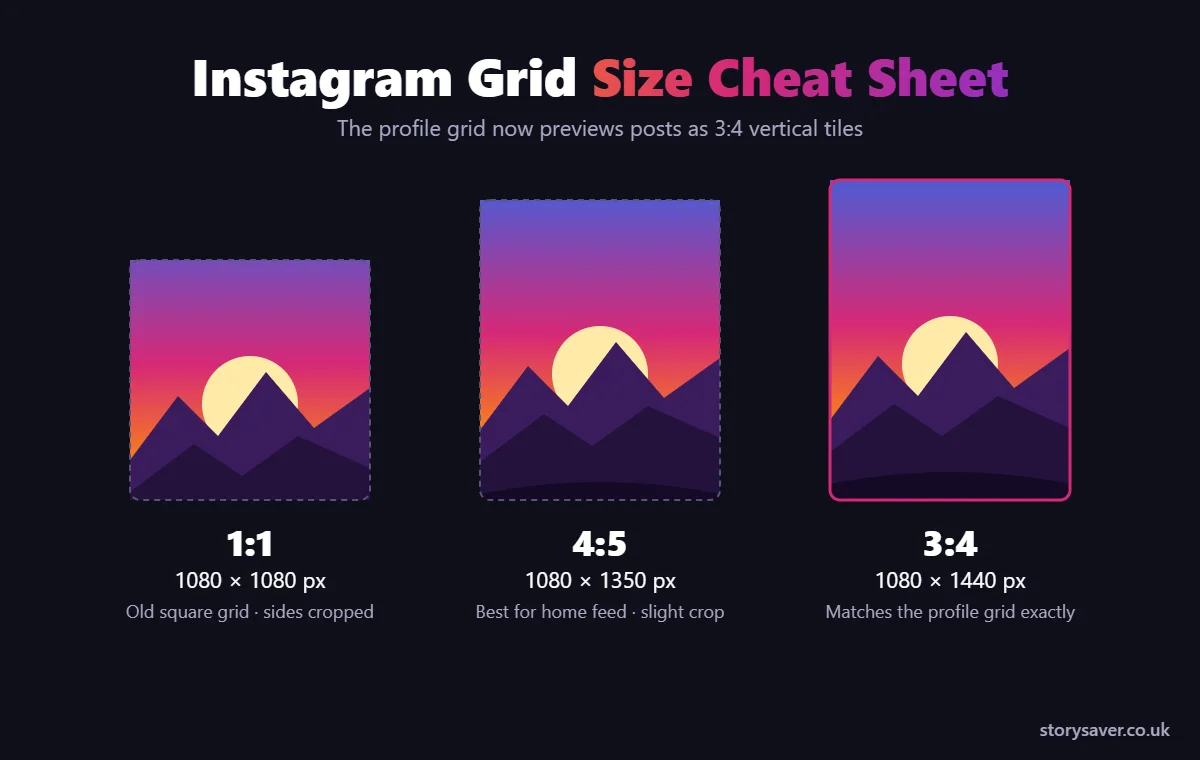
| Format | Size (px) | How it looks on the profile grid |
|---|---|---|
| Square 1:1 | 1080 × 1080 | Sides are cropped to fit the 3:4 tile |
| Portrait 4:5 | 1080 × 1350 | Small crop on the sides; best for the home feed |
| Grid 3:4 | 1080 × 1440 | Exact match—nothing important is cut off |
Tip: for a 3×3 grid at 3:4, your source image should be at least 3240 × 4320 px (three tiles of 1080 px wide and three tiles of 1440 px tall). Smaller images will still work, but they may look soft once Instagram compresses them. Keep faces, logos, and text away from the very edges of each tile, because Instagram may still crop a few pixels depending on the device.
Popular Instagram Grid Layouts
Every grid maker offers a few standard layouts. Choose one based on how much space you want the image to take on your profile.
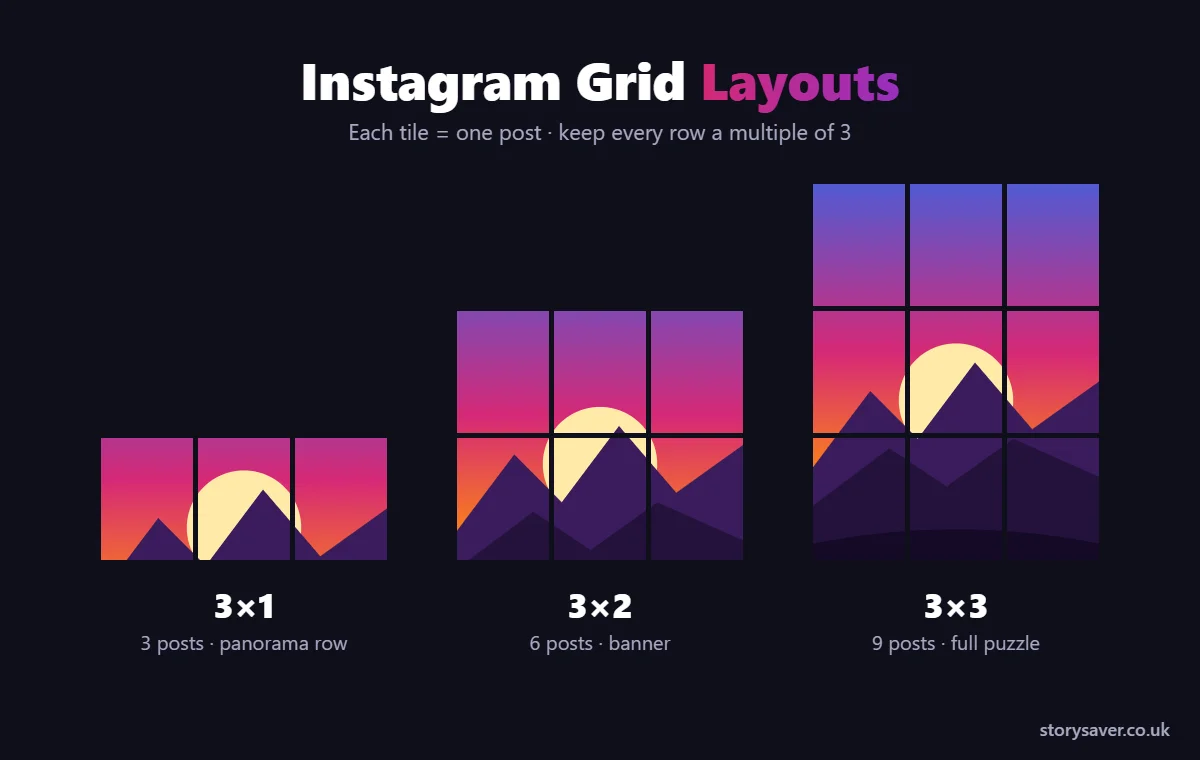
3×1 Grid (3 posts)
One full row across your profile. It works well for panoramas, landscape shots, short slogans, and quick announcements. It is the easiest layout to keep up with because you only need three posts.
3×2 Grid (6 posts)
Two rows that form a wide banner. This is a good choice for product launches, event posters, and campaign headers because it is large enough to grab attention without taking over your whole profile.
3×3 Grid (9 posts)
The classic “puzzle” look. Nine tiles fill the full screen when someone opens your profile on a phone. It has the biggest impact, but it needs a high-resolution image and careful posting.
Other creative layouts
- Row-by-row themes: each row of three posts shares one colour or topic.
- Checkerboard: alternate between two post styles, such as photo and quote.
- Column grid: keep the middle column for one type of content, such as tips or quotes.
- Endless puzzle: each new row connects to the row below it, creating a never-ending scroll.
How to Use an Instagram Grid Maker: Step-by-Step Guide
The steps below work with almost any grid maker, whether you use a mobile app, a free online splitter or a design tool like Canva.
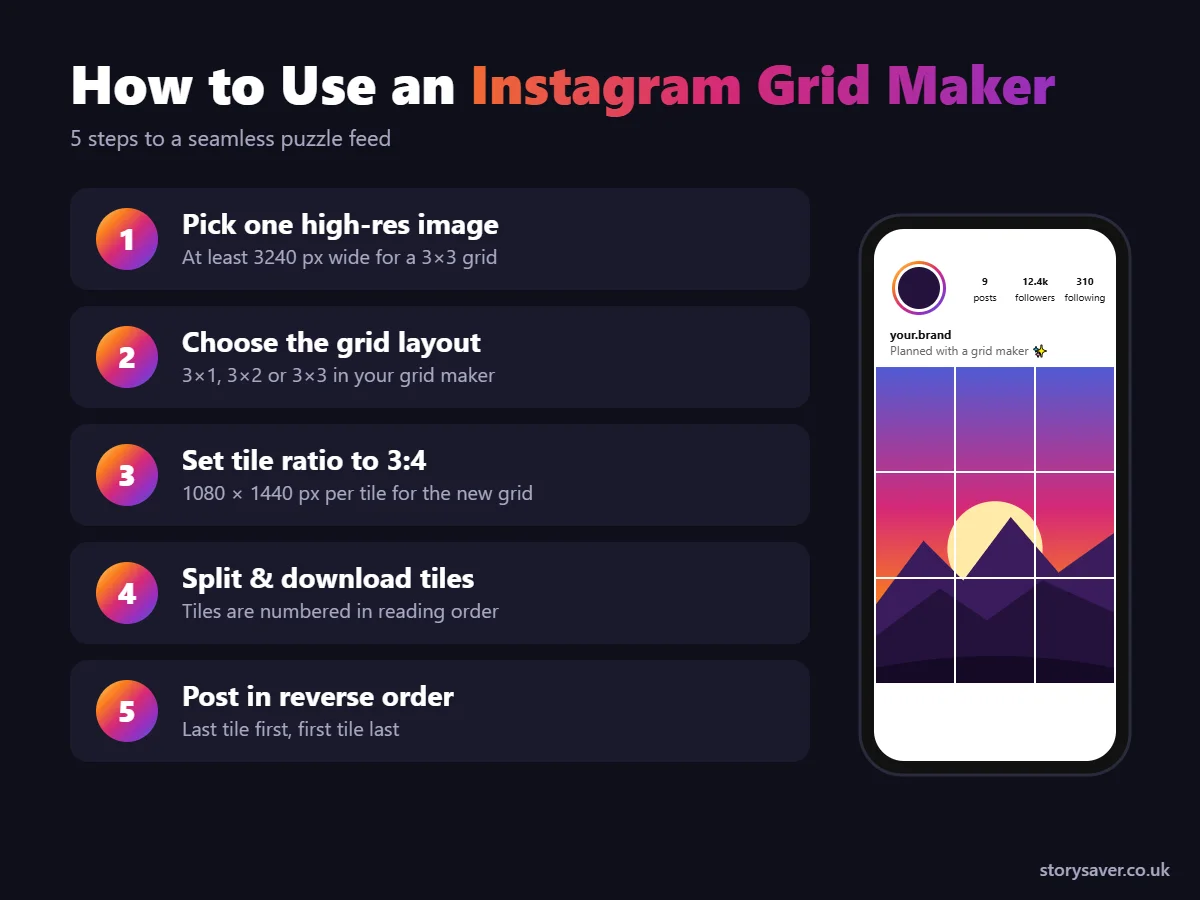
Step 1: Choose a high-resolution image.
Pick a photo or design with a clear subject and strong colors. For a 3×3 grid, aim for at least 3240 px wide. If your image is too small, use an AI upscaler first (more on this below).
Step 2: Open your grid maker and upload the image.
Open the app or website (for example, our free Instagram grid maker tool) and upload your image. Most tools work in the browser and do not need an account. Some apps let you import straight from your camera roll.
Step 3: Select the grid layout.
Choose 3×1, 3×2 or 3×3. Some tools also offer 3×4 or 3×5 for very tall images. Remember that the number of columns must always be three to match Instagram.
Step 4: Set the tile ratio to 3:4
If the tool lets you pick the tile shape, choose 3:4 (1080 × 1440 px) to match the current profile grid. If it only offers square or 4:5 tiles, keep important details in the center of each tile so nothing important gets cropped.
Step 5: Adjust and preview
Move and zoom the image until the subject sits where you want it. Check the preview carefully: make sure faces, text, and logos are not cut in half by the lines between tiles.
Step 6: Split and download the tiles
Click split or export. You will usually get a ZIP file or a set of numbered images. Tile 1 is the top-left, and the numbers go left to right, row by row.
Step 7: Post the tiles in reverse order.
This is the step most people get wrong. Read the next section before you upload anything.
The Right Posting Order for Your Instagram Grid
Instagram always puts your newest post in the top-left corner of your profile. That means you must upload the last tile first and the first tile last.
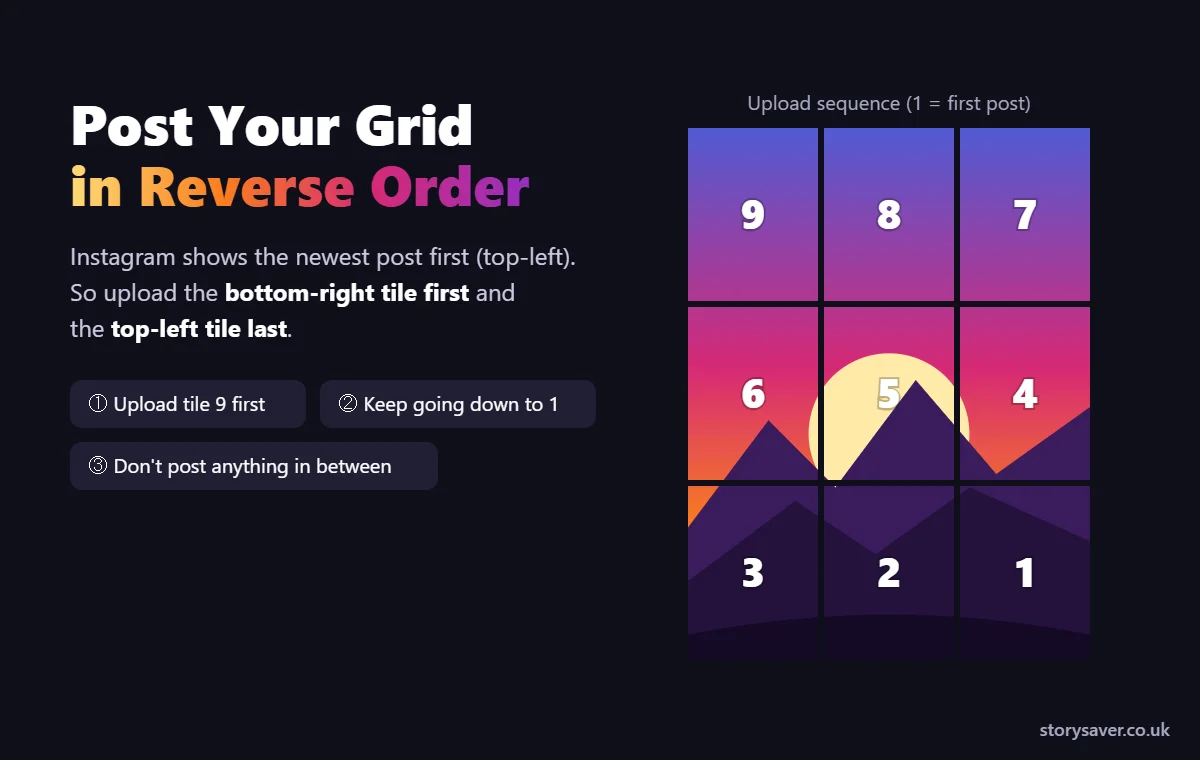
For a 3×3 grid, post tile 9 first, then 8, 7, 6 and so on, until you finish with tile 1. A few extra tips:
- Do not post anything else in between—one extra post will shift every tile and break the picture.
- Pin posts carefully: pinned posts sit at the top of your grid and can push your tiles out of line. Unpin them, or plan your grid around them.
- Space out uploads: posting nine tiles in one minute can flood your followers’ feeds. Leaving a short gap between posts, or scheduling them, looks more natural.
- Write a caption for every tile: each tile still shows on its own in the home feed, so give each one a useful caption and relevant hashtags.
How AI Is Changing Instagram Grid Makers
Grid makers used to be simple cropping tools. In 2026, AI has turned many of them into smart design assistants. Here is how AI helps you build a better grid:
1. AI image expansion (generative fill)
Your photo is landscape, but a 3×3 grid at 3:4 needs a tall image. AI “expand” or “generative fill” features in tools such as Canva and Adobe Express can create extra background above, below or beside your photo so it fits the grid without awkward cropping.
2. AI upscaling
Split tiles are much smaller than the original image, so low-resolution photos quickly look blurry. AI upscalers increase resolution and sharpen details before you split, which keeps every tile crisp.
3. AI grid preview and planning
Planning apps like Later, Planoly and Preview show a live preview of your profile. Several of them now use AI to suggest post-order, spot colour clashes, and recommend the best times to publish.
4. AI captions and hashtags
Writing nine captions for nine tiles takes time. Built-in AI caption writers can draft a caption for each tile in your brand voice. Always edit them so they sound like you.
5. AI-generated grid art
You do not even need a photo. AI image generators can create one large illustration or poster, made to your exact size, which you then split into a puzzle grid. This is popular with artists, gaming pages, and meme accounts.
Best Instagram Grid Maker Tools in 2026
There are dozens of grid makers. These are some of the most popular options, grouped by what they do best. Features and pricing change often, so check each tool’s website before you sign up.
| Tool | Type | Best for |
|---|---|---|
| Story Saver Instagram Grid Maker | Free browser grid splitter | Splitting a photo into 3×3 grid tiles in seconds, with no signup |
| Canva | Design tool with grid templates and AI features | Designing grid posts with text, brand kits and AI image editing |
| Adobe Express | Design tool with generative AI | Expanding and editing images with AI before splitting |
| Kapwing | Browser editor with grid templates | Quick 3×1 to 3×3 splits without installing an app |
| Later | Visual planner and scheduler | Previewing and auto-publishing grid posts |
| Planoly | Visual planner and scheduler | Drag-and-drop feed planning with AI captions |
| Preview App | Mobile feed planner | Planning your grid on iPhone or Android |
| PhotoSplit | iOS grid splitter | Splitting photos and posting in the right order from your phone |
| Free online splitters (e.g. Pallyy, Storrito) | Browser grid makers | Fast, free splits with no signup |
How to choose: if you only want to split a photo once, a free online splitter is enough. If you post regularly and care about your feed’s look, a planner with scheduling and AI features will save you hours each month.
Instagram Grid Maker vs Carousel Splitter
These two tools are easy to mix up:
- A grid maker splits an image vertically and horizontally into separate posts that form one picture on your profile.
- A carousel splitter cuts a wide image horizontally into slides inside one carousel post, so people swipe through a seamless panorama.
If you want a swipeable panorama instead of a profile puzzle, try our free Instagram Carousel Splitter. You can also browse all our free Instagram tools.
10 Instagram Grid Ideas to Try
- Brand launch banner: a 3×2 grid with your logo and tagline.
- Travel panorama: a 3×1 landscape of mountains, beaches or a city skyline.
- Product reveal: a 3×3 grid where each tile shows part of a new product.
- Artist portfolio: one large illustration that rewards visitors who scroll your profile.
- Countdown: post tiles one by one in the days before an event or sale.
- Quote wall: a large motivational quote spread across three or six tiles.
- Before and after: one row for “before”, one row for “after”.
- Colour story: each row of three posts uses one colour palette.
- AI art puzzle: generate a detailed AI illustration and split it into a 3×3 grid.
- Welcome grid: a 3×1 header that says who you are and what you post.
Common Instagram Grid Mistakes to Avoid
- Using square tiles on the new grid: 1:1 tiles get cropped on the 3:4 profile view and the picture will not line up perfectly.
- Posting in the wrong order: always start with the bottom-right tile.
- Low-resolution images: each tile is a fraction of the original, so a small photo will look blurry.
- Text across tile edges: words cut between two tiles are hard to read in the home feed.
- Forgetting the home feed: followers see tiles one at a time, so every tile should still look good on its own.
- Breaking the grid later: one random post will shift the whole puzzle. Plan future posts in rows of three.
Frequently Asked Questions
What is the best size for an Instagram grid maker?
Since Instagram’s profile grid now uses 3:4 vertical thumbnails, the best tile size is 1080 × 1440 px. For a full 3×3 grid, start with an image of at least 3240 × 4320 px.
Is there a free Instagram grid maker?
Yes. Many browser-based grid makers are free and do not need an account, including our own free Instagram grid maker. Design tools like Canva and Kapwing also offer free plans with grid templates.
In what order should I post my Instagram grid?
Post in reverse order. Upload the bottom-right tile first and the top-left tile last, because Instagram shows the newest post in the top-left corner of your profile.
Why does my Instagram grid not line up?
The most common reasons are using square or 4:5 tiles on the 3:4 profile grid, posting tiles in the wrong order, posting something else in between, or a pinned post pushing the tiles out of line.
Can AI help me make an Instagram grid?
Yes. AI tools can expand a photo to the right shape, upscale low-resolution images, generate artwork made for grids, suggest feed layouts and write captions for each tile.
Will a grid post hurt my Instagram reach?
A grid is just a set of normal posts, so it does not lower your reach on its own. However, posting many tiles at once can flood followers’ feeds, so space your uploads out and give each tile a strong caption.
Conclusion
An Instagram grid maker is one of the easiest ways to make your profile look bold, organised and professional. Remember the three golden rules: use 3:4 tiles at 1080 × 1440 px, start with a high-resolution image, and always post in reverse order. Add AI tools for image expansion, upscaling and feed planning, and you can build an eye-catching puzzle feed in minutes instead of hours.